Pokémon Sword and Shield: How to use the Flying Taxi

As much as I think that Pokémon Sword and Shield's Galar region is an absolute feast for the eyes, it's super convenient to fast traveling around the map instead of backtracking trails the long way. One of the best things about Pokémon Sword and Shield is that you can fly to places you've already been to from pretty early on. In previous games, you usually only acquired this ability once you'd made it through most of the map. The funny thing is, while the game lets you know that Flying Taxis are available, it doesn't really teach you how to use this feature. Here's how to use the Flying Taxi in Pokémon Sword and Shield.
When can I start using the Flying Taxi?
Shortly after you've reached the Motostoke Stadium you'll be able to use the Flying Taxi, which is basically a Corviknight that flies you around the map. Depending on how much time you spend investigating the Wild Area and catching Pokémon, it could take you anywhere from 30 minutes to an hour to unlock the Flying Taxi after you've started a new game.
How to use a Flying Taxi
- While in the game press X on your right Joy-Con.
- When the menu pops up, select Town Map.Source: iMore


- When the map appears, using the joystick or the buttons on your left Joy-Con, move the cursor over the location you want to fast travel to. Note that you can only fast travel to loctions you've been to already.
- Press A to initiate the Flying Taxi.Source: iMore


- The game will ask you if this is really where you want to go. Select "Yes".
In the blink of an eye, you'll be at the city, route, or location you selected and you can continue on with your game.


Source: iMore
There you have it. Now you know how to fast travel around the Galar region map using the Corviknight Flying Taxi. It's kind of funny that the game doesn't walk you through this process, given how tutorial-focused it is at first. At any rate, it's nice that you can fly around the map so easily from the get-go. Enjoy your travels in the Galar region and good luck catching all those new Pokémon!
Additional Equipment
I love these accessories and have found that they greatly improve my Switch gaming sessions. See if anything catches your eye.

Pro Controller ($62 at Amazon)
Master your iPhone in minutes
iMore offers spot-on advice and guidance from our team of experts, with decades of Apple device experience to lean on. Learn more with iMore!
Whether you've got the larger Nintendo Switch or the Switch Lite, you can benefit from using a Pro Controller. It features motion controls, amiibo functionality, and a better ergonomic design to enhance your gaming experience. It's also wireless, so you won't have to worry about tripping over cables.

Hori Compact Playstand ($13 at Amazon)
Whether you're using a Switch Lite or the larger Switch having a stand can be incredibly helpful. I typically use mine on the go when I either need to charge my Switch or when I simply want to bring the screen closer to my face.

Gimme some space! ($26 at Amazon)
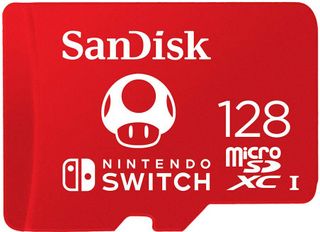
Regardless of the version of Switch you're using, you can always benefit from having more memory on the system. This microSD card has a cute Mario mushroom on it and gives you 128GB. That's plenty of space for screenshots, game data, and downloads.
Updated September 24, 2019: Added section on setting network DNS back to Automatic.

Gaming aficionado Rebecca Spear is iMore's dedicated gaming editor with a focus on Nintendo Switch and iOS gaming. You’ll never catch her without her Switch or her iPad Air handy. If you’ve got a question about Pokémon, The Legend of Zelda, or just about any other Nintendo series check out her guides to help you out. Rebecca has written thousands of articles in the last six years including hundreds of extensive gaming guides, previews, and reviews for both Switch and Apple Arcade. She also loves checking out new gaming accessories like iPhone controllers and has her ear to the ground when it comes to covering the next big trend.

