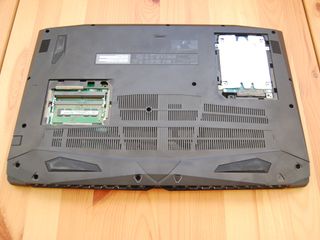
A major feature of Acer's Nitro 5 gaming laptop is how easy it is to replace or add RAM thanks to an easy-access panel on the bottom. The older 2019 models on which this guide is based come with an easy-access panel on the bottom, allowing you to swap out the SODIMM RAM. If you're interested in adding a bit of performance boost, the entire process of upgrading RAM in your Acer Nitro 5 should take only a few minutes.
How to upgrade the RAM in your Acer Nitro 5
The Crucial DDR4 SODIMM RAM we're using here is available in 8GB sticks. As long as you don't exceed 32GB total RAM (which is where the Nitro 5 maxes out and would frankly be overkill compared to the rest of the hardware), you should be in the clear.
It's never a bad idea to back up your PC before doing any sort of upgrades. It might add a few minutes to the total time of the upgrade, but you'll be more than thankful in the unlikely event that something goes wrong. You might also want to check out one of the best computer toolkits that has everything you need for upgrades.
Before beginning, be sure that you're not working in an environment full of static. If at all concerned, consider investing in an anti-static wristband. Also, ensure that your Nitro 5 is powered off.
Once you're set up in a spot devoid of static and with tools at hand, we can begin the process.
- Locate the small, vented access panel on the bottom of your Acer Nitro 5.
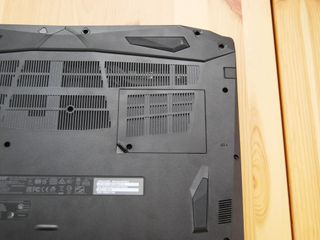
- Unscrew the single fastener with a Phillips-head screwdriver.
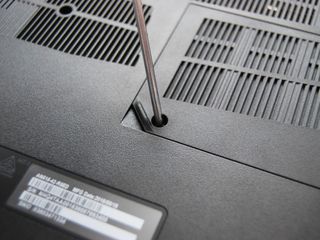
- Pry up the panel with a finger or pry tool. You should now see a single stick of RAM with a free slot above it.

- Line up the notch in the new stick of RAM with the ridge in the RAM slot in the laptop. Due to the SODIMM design, it will slide in only one way.
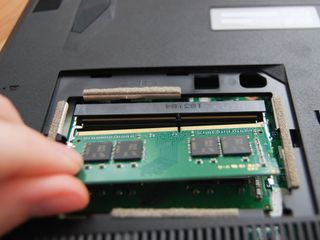
- Push in the stick of RAM at a 45-degree angle until the pins disappear (or nearly disappear).
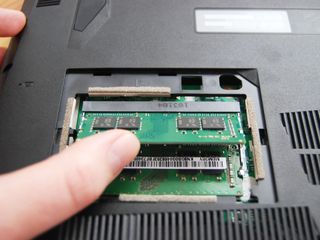
- Press down on the stick of RAM so that it clicks into place. The small metal holders on either side should hold the stick in place when it's inserted properly.
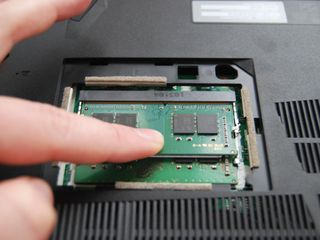
- Press the access panel back into place, being sure that all small teeth are properly inserted. You should hear a few clicks before it's seated properly.
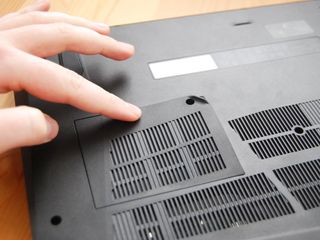
- Screw in the fastener using a Phillips-head screwdriver.

You can now power on your Nitro 5 and verify that the RAM you've installed is recognized by the system.
- Right-click the Start button.
- Click System.

You should now be able to see the total amount of installed RAM in the Device specifications section. As long as it matches the total amount you have installed, your upgrade was a success.
Get the Windows Central Newsletter
All the latest news, reviews, and guides for Windows and Xbox diehards.

Our top hardware picks
Though it's not the only option for your Acer Nitro 5, the Crucial SODIMM RAM we used for this guide is reliable, relatively cheap, and is definitely compatible with your laptop. It matches the DDR4-2400 RAM that comes standard with the 2019 Nitro 5, and it's available in 4GB sticks all the way up to a 32GB kit with two 16GB sticks.

Compatible SODIMM RAM
This Crucial RAM won't break the bank, is definitely compatible with your Acer Nitro 5, and is available in a bunch of different sizes to let you install the exact amount of RAM you want.
One of the best features of the Acer Nitro 5 is how easy it is to upgrade RAM and storage, allowing you to keep it relevant for longer.
Additional equipment
To make the upgrade process easier and less risky, consider investing in some of these affordable PC tools.
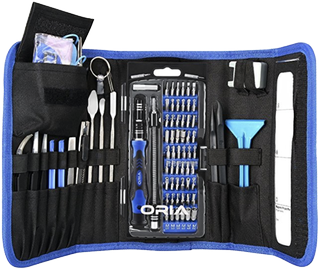
ORIA PC toolkit ($30 at Amazon)
Having the proper gear to work on your PC will always make the job much easier. Here you get a plethora of tools contained in a portable case.

Rosewill anti-static wristband ($9 at Amazon)
Static electricity can damage sensitive PC parts, so remove the risk with an anti-static wristband. Fasten it around your wrist and clip it onto your PC for peace of mind.

Cale Hunt brings to Windows Central more than eight years of experience writing about laptops, PCs, accessories, games, and beyond. If it runs Windows or in some way complements the hardware, there’s a good chance he knows about it, has written about it, or is already busy testing it.