One of the most powerful features found with Google Nest-branded cameras is the ability to set up activity zones. The zones, once set up, not only let you control exactly what notifications and activity will be monitored. But also where monitoring will take place for a specific range of activity or event types.
That doesn’t mean it’s necessarily easy to set up the zones. Especially if you’re not tech-savvy or haven’t used this type of technology before. So that’s exactly what this guide sets out to explain. So, if you want to take more control over what activity your Nest cameras inform you about, read on.
The process will be different depending on the app and cameras you use
Now, if you want to know how to set up activity zones for your Nest cameras, there are some differences depending on the device you’re using. And those aren’t the same as those typically found in how-to guides either. Namely, newer gadgets such as the Nest Cam (Battery) and Nest Doorbell (Battery) don’t use the Nest app. So you’ll need to follow the guidelines for the Google Home app for those gadgets. Older gadgets can and do use the Nest app for this process.
Although, the differences in setting up zones for activity monitoring on the Nest web app are similar enough. So there shouldn’t be any issues if that’s your preferred platform for using your Nest cameras. The primary caveat will, of course, come from limitations based on your subscription level. If you’re not subscribed to Nest Aware, you won’t have as much control over what, exactly, your cameras are able to detect.
Here’s how to set up activity zones for your Nest cameras in Google Home
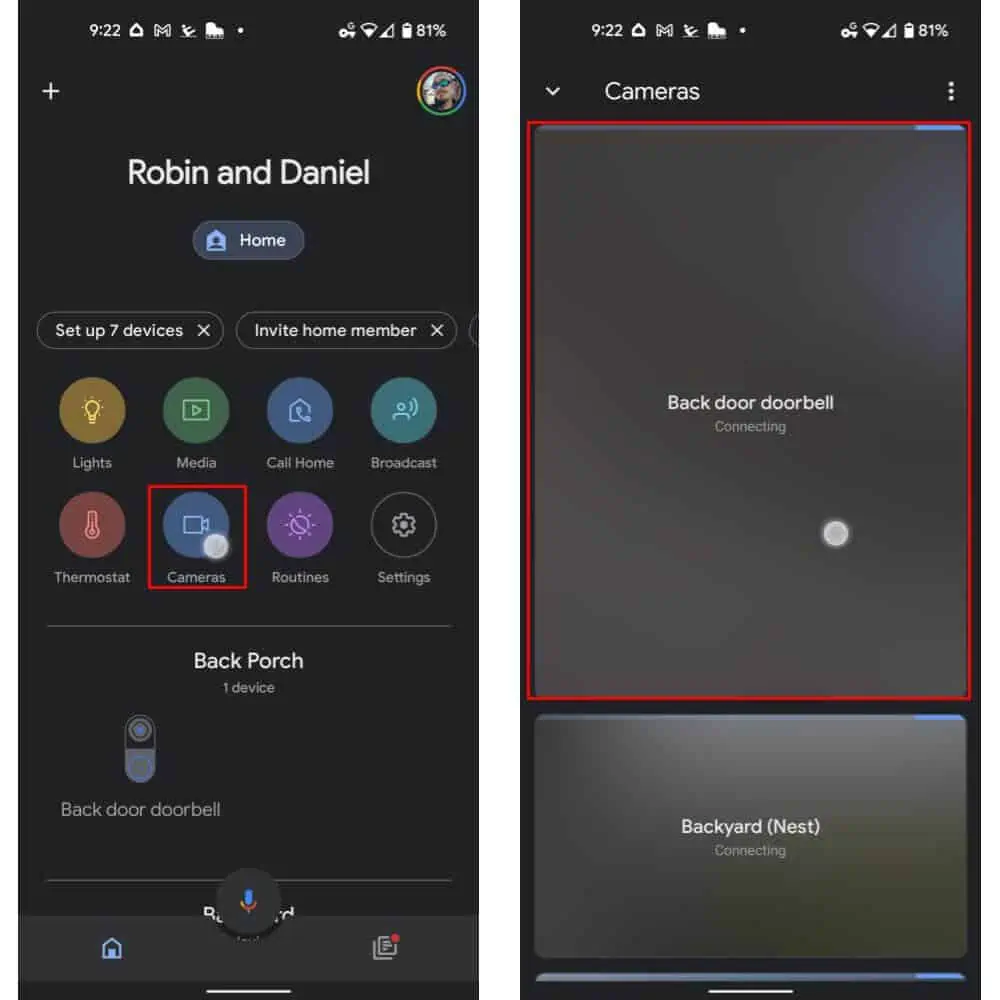
Of course, the first step will be to open up the Google Home application itself. Then you’ll want to select the “Cameras” icon at the top of the home tab, located near the center of the screen when first loaded up. Next, select the camera you’d like to set up zones for. We’ve selected the “Back door doorbell” in our sample images below.
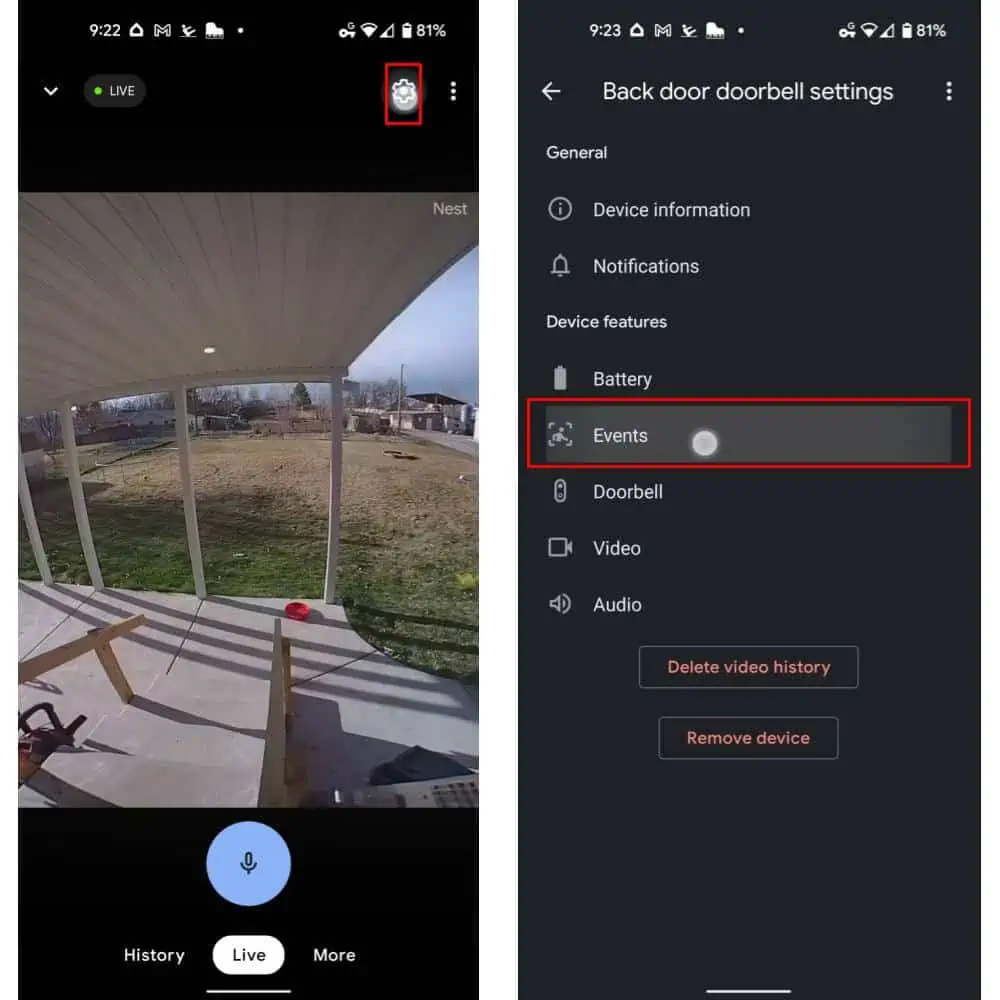
Once loaded, select the gear- or cog-shaped Settings icon at the top right-hand side of the UI. Then select “Events.”
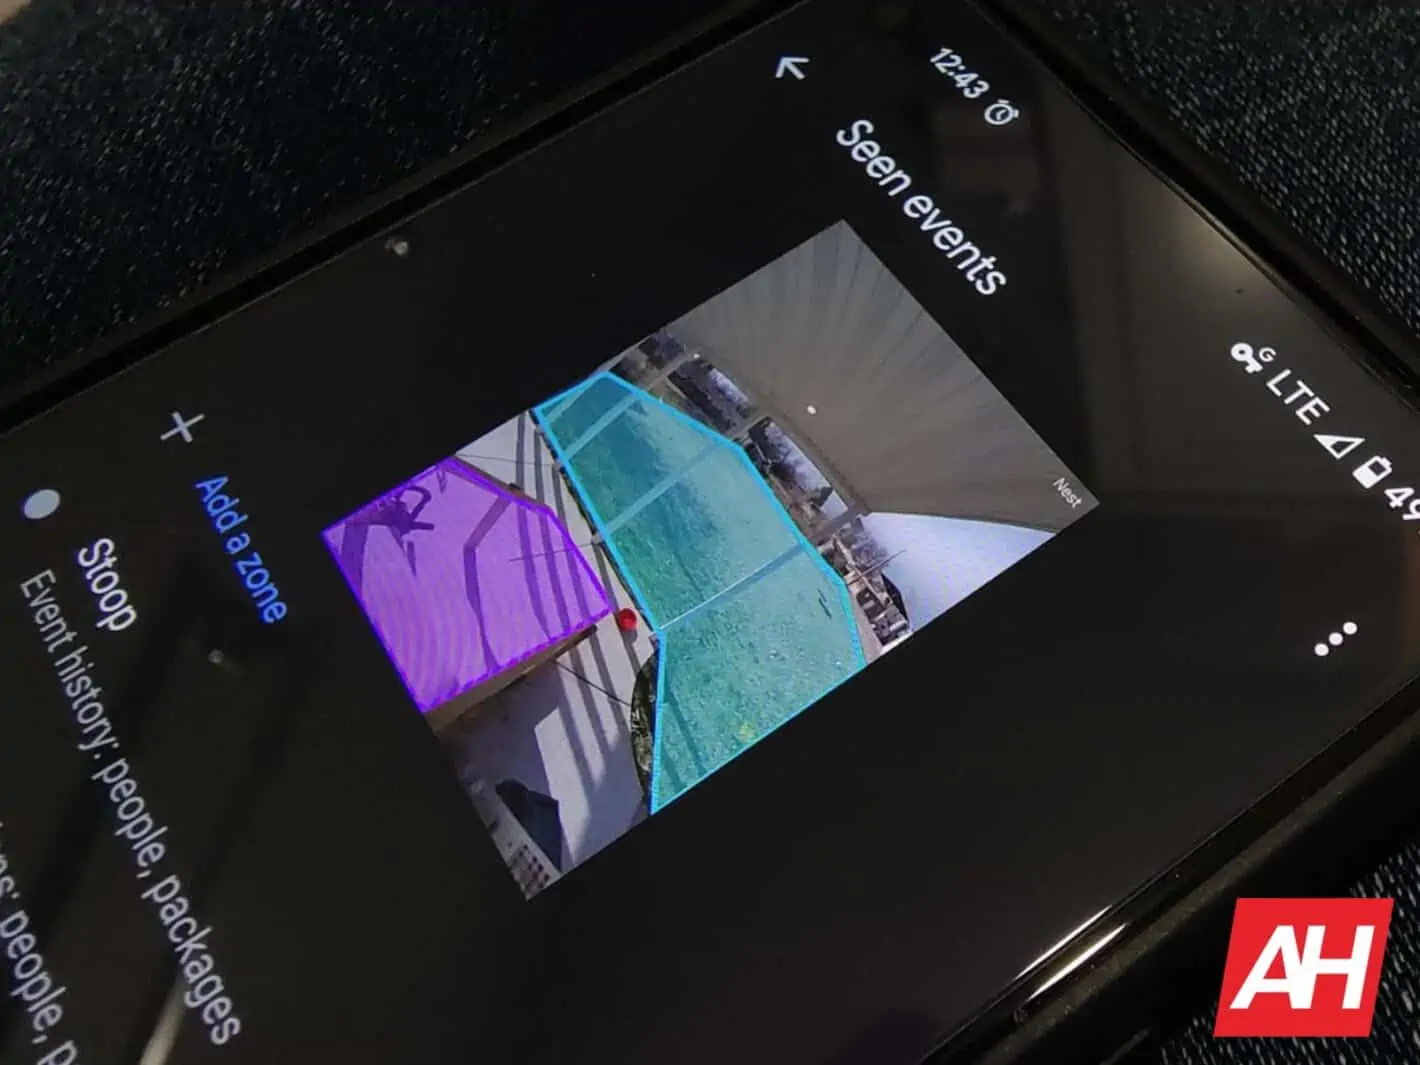
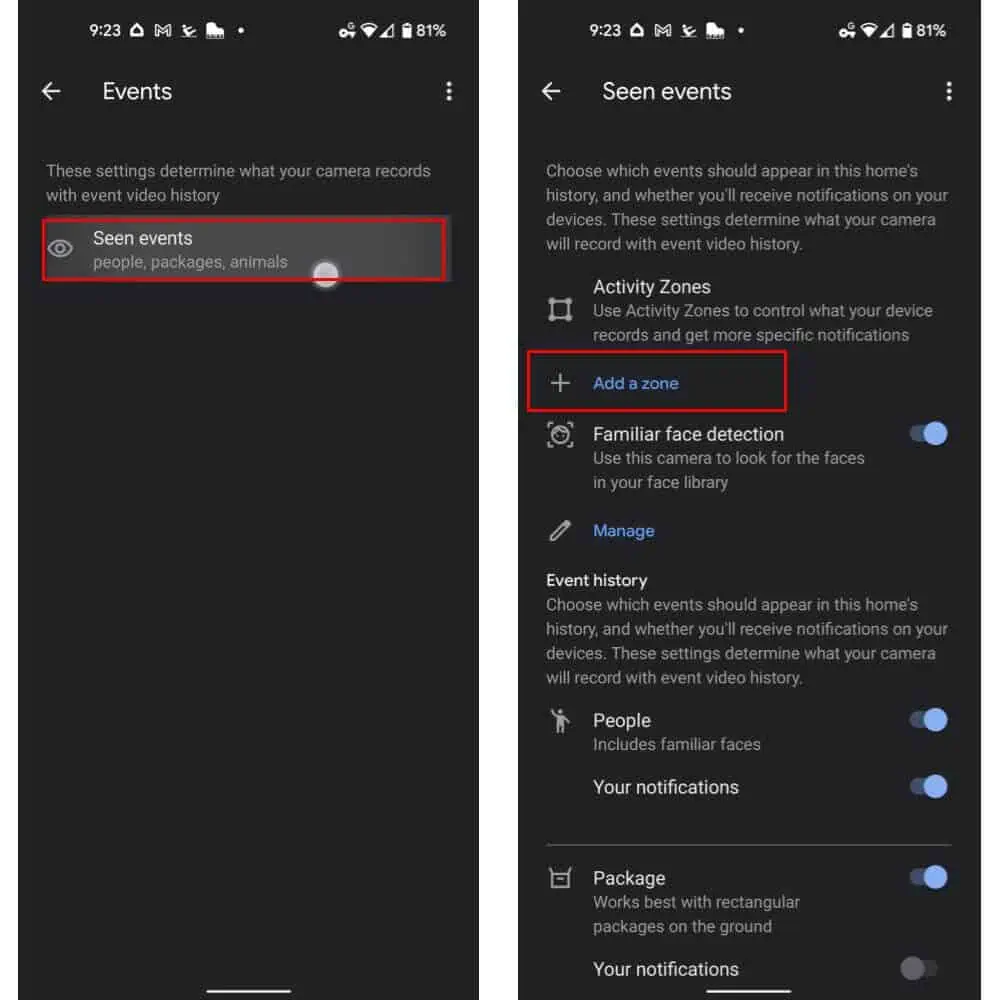
In Events, if you’ve got more than one type of event notification set up, you’ll see those options. Select “Seen events” as shown in the sample image below. Then select “Add a zone” from the list of options. That’s located near the top of the Seen events page.
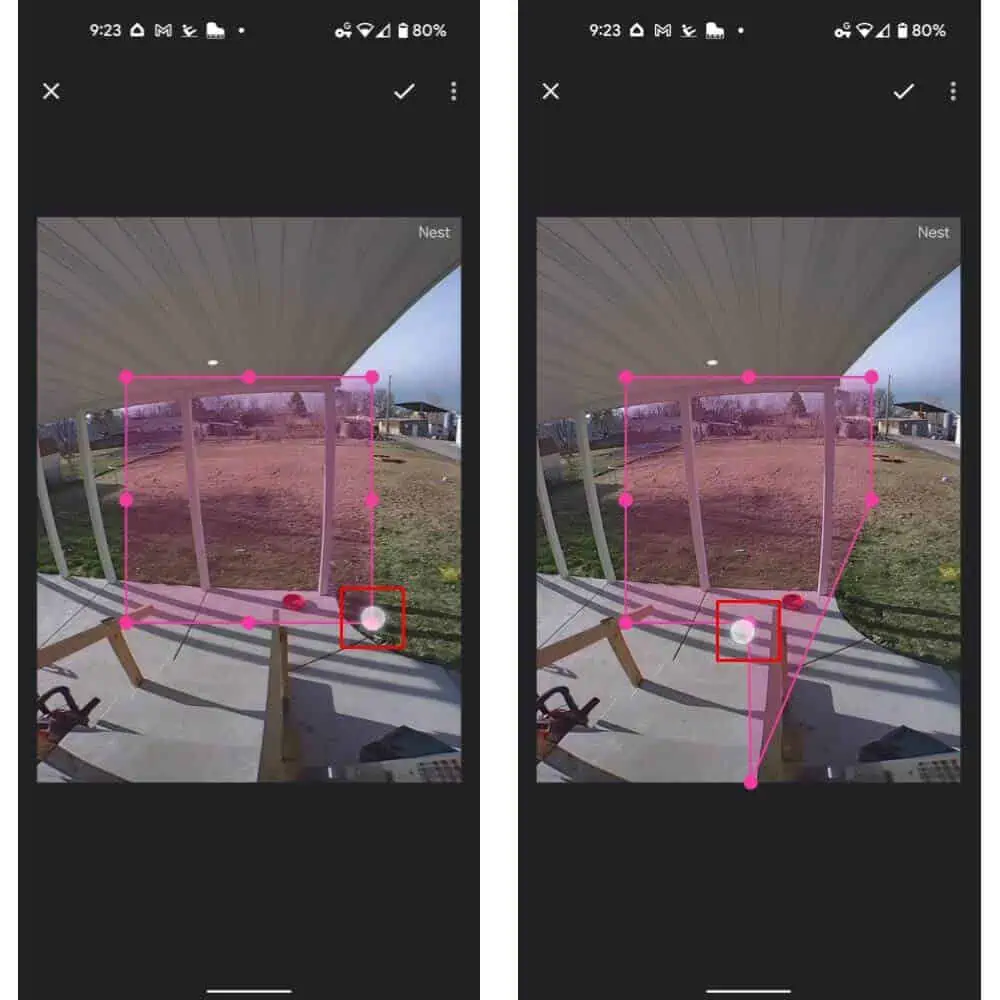
The UI will show your camera feed as well as a box with resizing dot UI. To resize and move the zone, tap and hold on any of those dots, as shown below. Then drag the dots into position to create a zone to be set for your Nest cameras — for the purpose of this how-to, that’s shown in pink below. The colored-in area represents the area to be monitored.
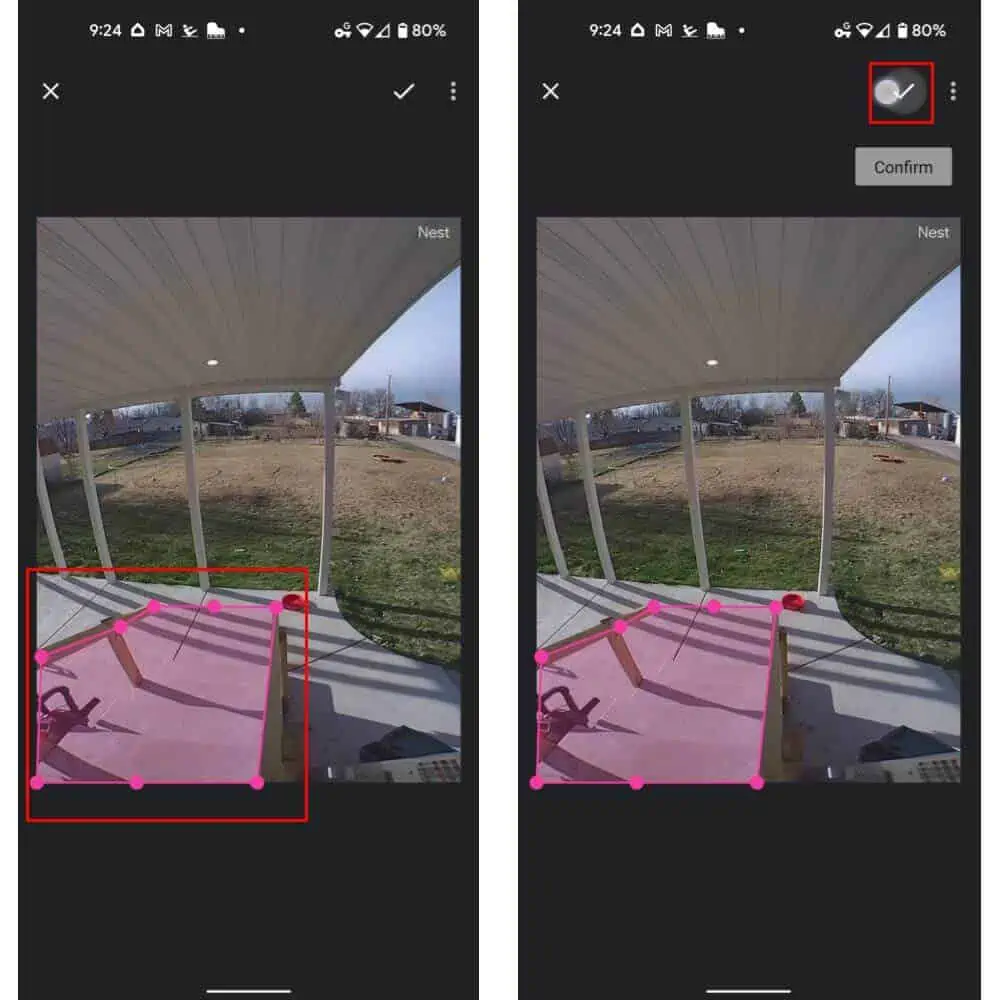
Once you’ve resized and maneuvered the dots to create the zone you’d like, select the checkmark at the top right-hand side of the UI. As shown below, we’ve created a zone to monitor the doorstep.
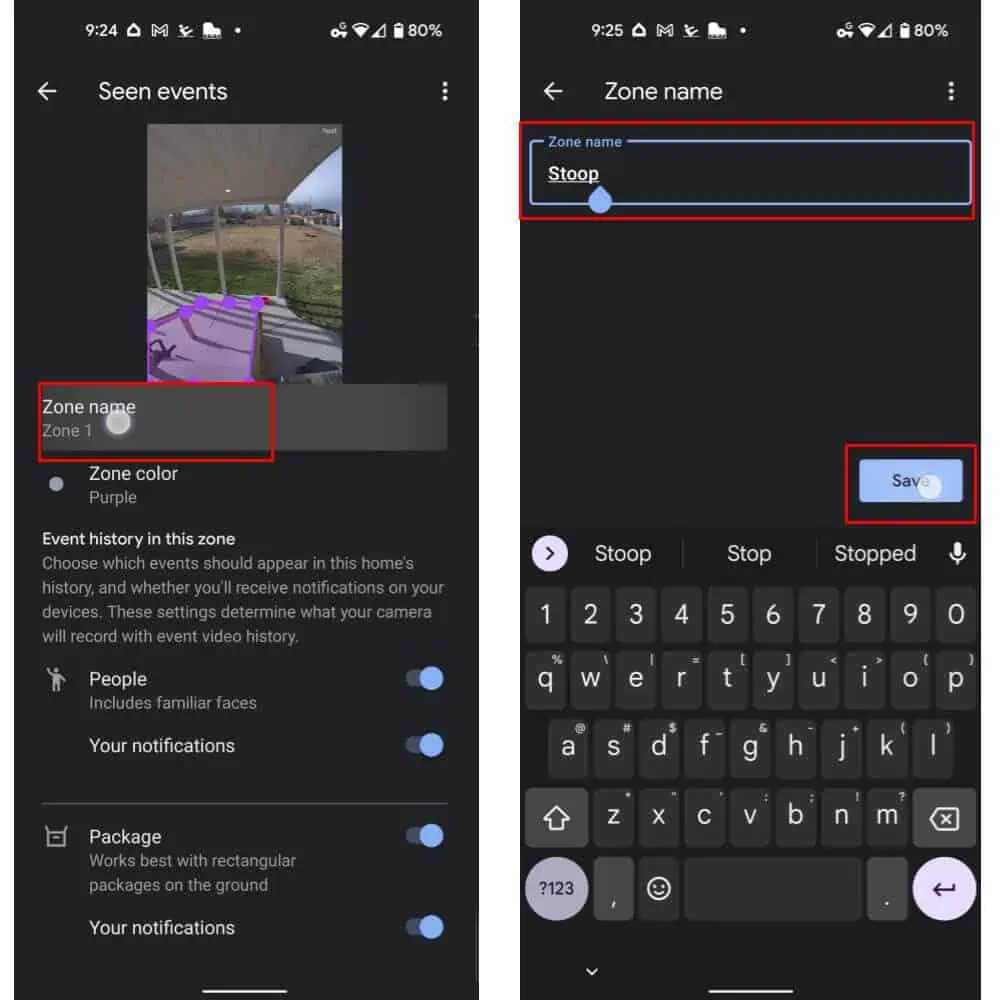
The new zone will be shown with additional options to set which activities and events you’d like the cameras to watch for within the zone.
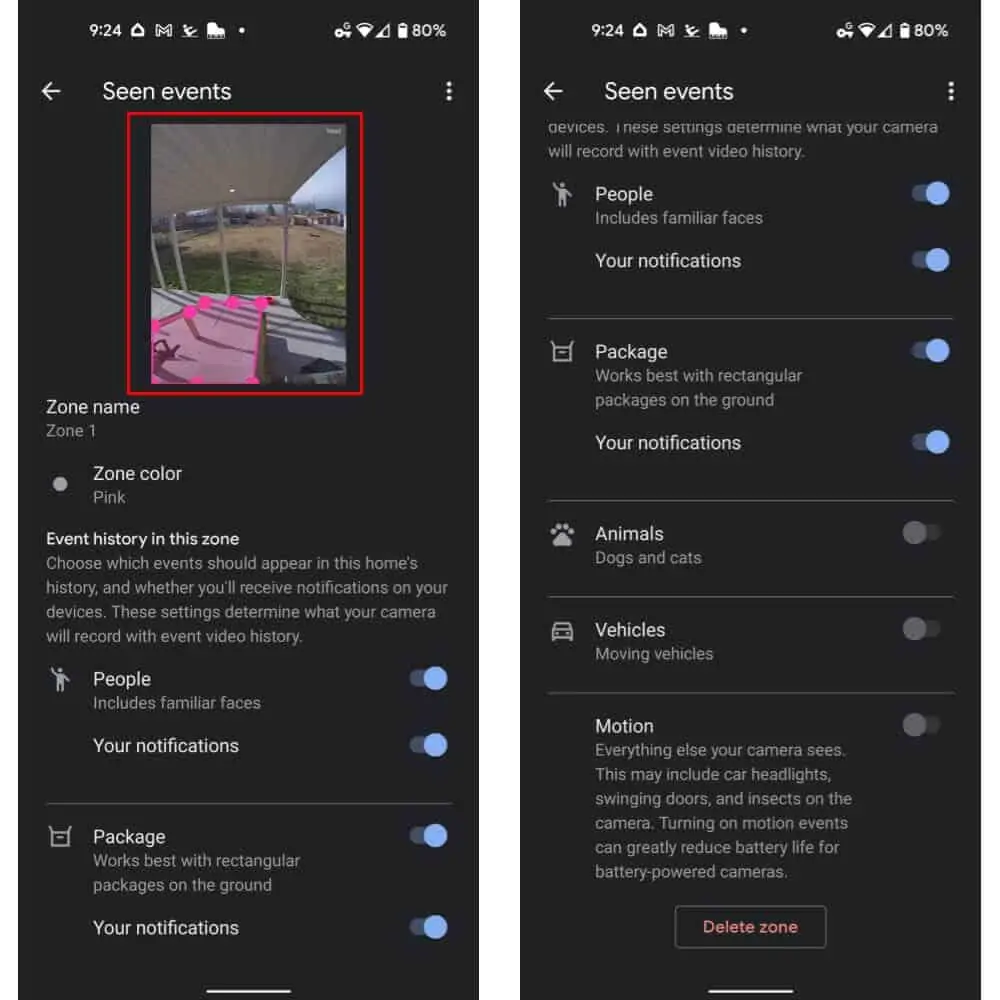
To change the color of a zone, simply tap the “Zone color” option and select a new one.

To change the name of the zone, you can select “Zone name” and then enter a new name. Then select “Save.” We named our zone “Stoop” in the sample image below. The zone name will appear in any notifications you receive about the zone. So, for instance, the cameras will send a notification showing a “person” in the “Stoop” with our setup.
To add more zones, simply tap the back button and then select “Add a zone” again. Previously created zones will be shown just below the option.
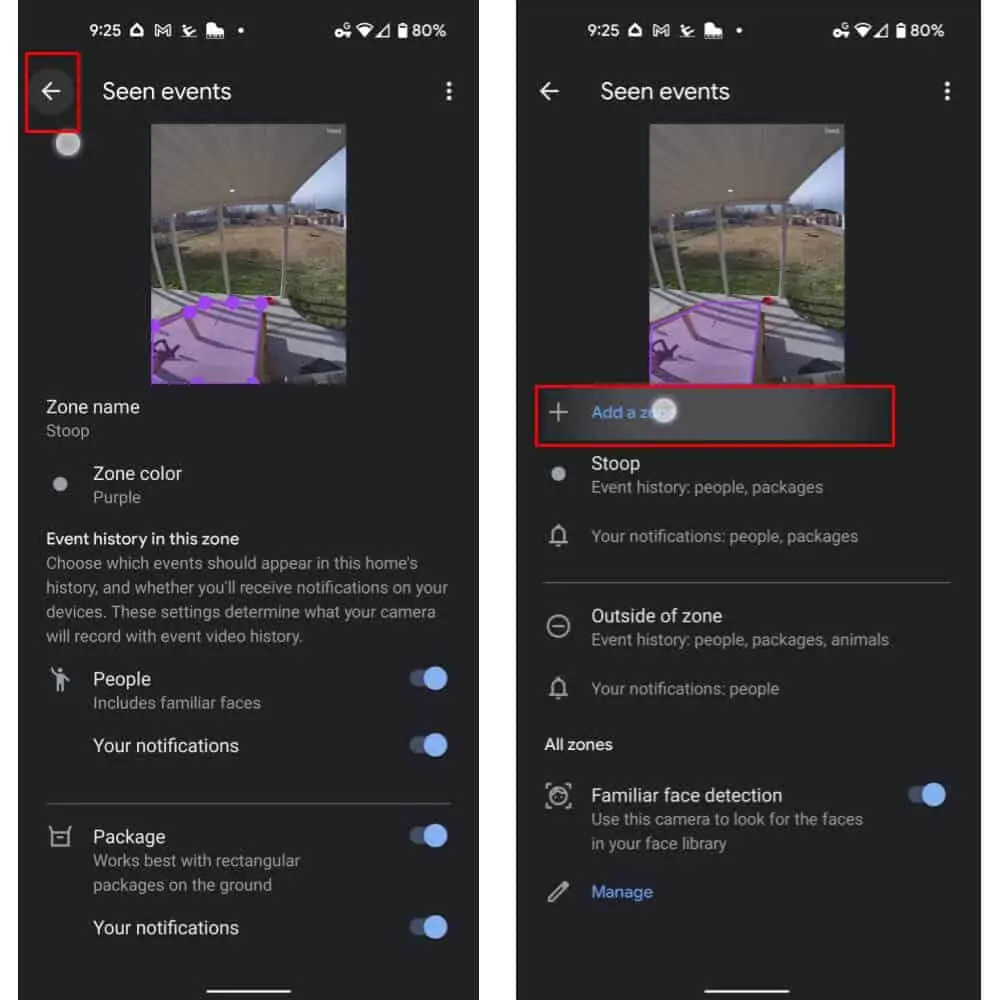
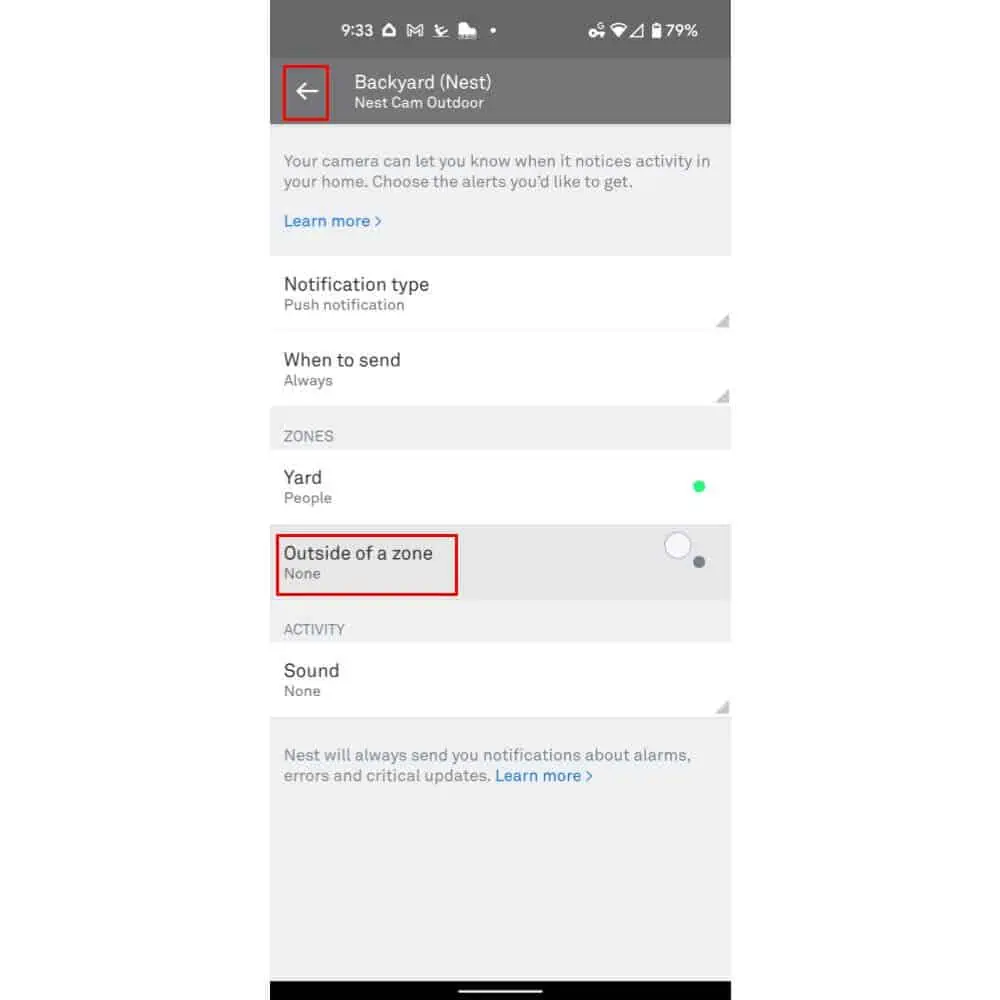
Once you’ve created your zones, you will be able to see what the zones are called, what they’re monitoring for, and you can also select those options for notifications from “Outside of” the zone. For example, if you want to negate notifications from the extended range of your cameras’ view. As shown in the image below.

…or using the Nest app for activity zones instead
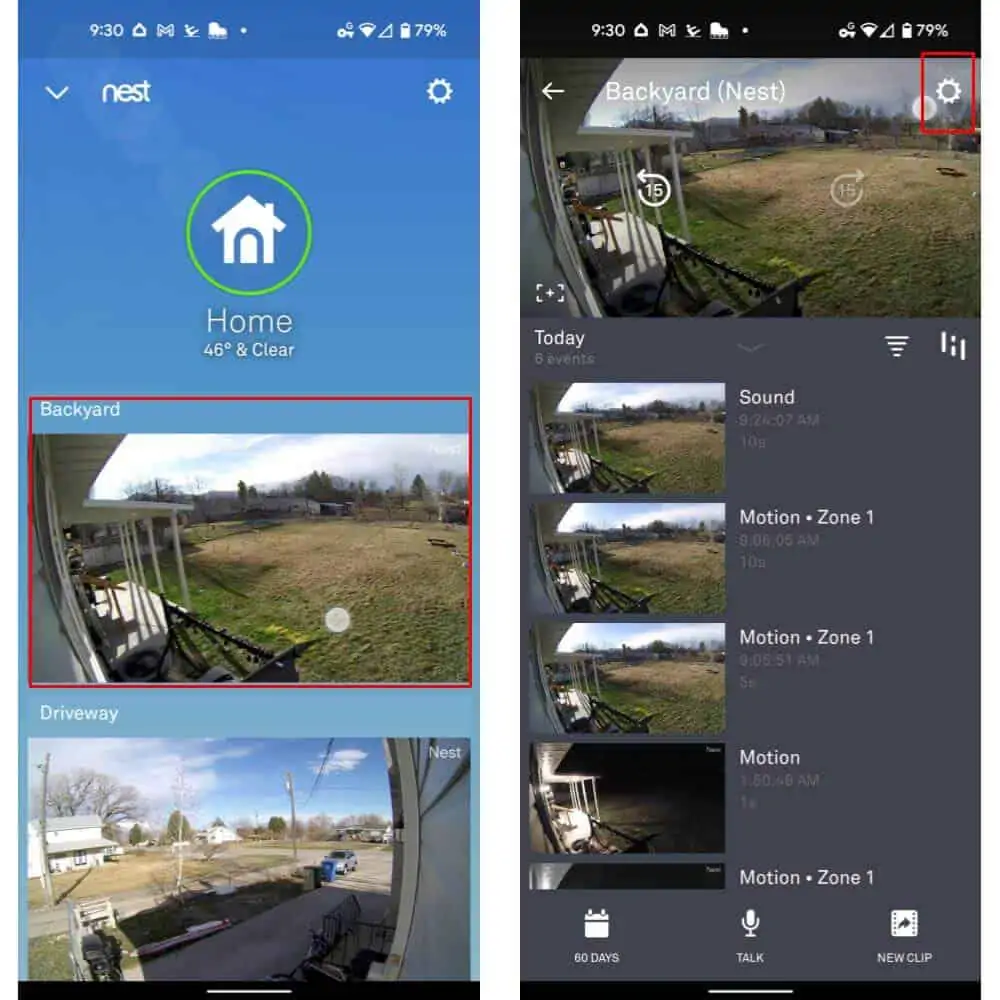
Of course, you can also set up zones in the Nest app itself. Begin by opening the Nest app and then selecting the appropriate camera, as shown in the image below. You can then select the Settings icon, located at the top right-hand side of the camera UI.
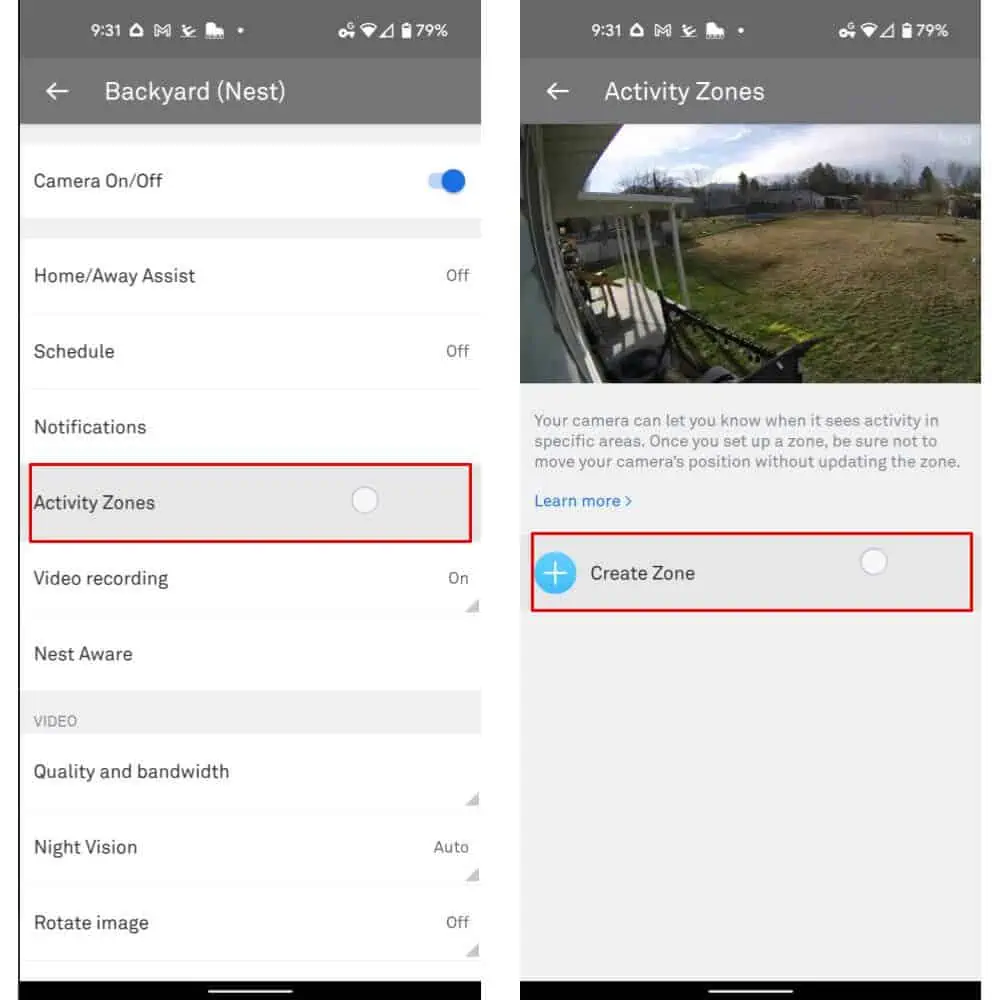
Now, select the “Activity Zones” option from the list of available settings. The UI will load up any Activity Zones you’ve created as well as a “Create Zone” button. Select that button.
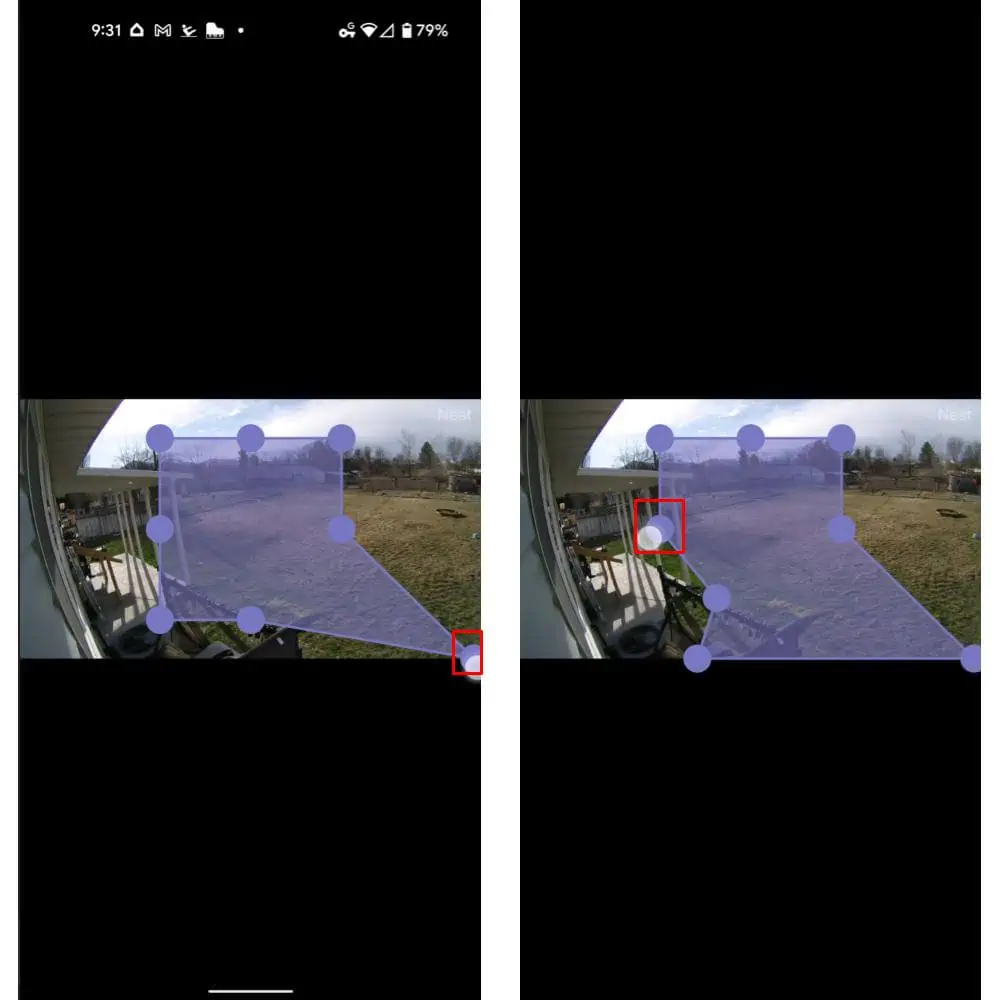
As with the Google Home method, you’ll now need to tap and drag on the resizing dot UI to select a zone for monitoring. The colored-in area represents the area to be monitored for your specified activity.
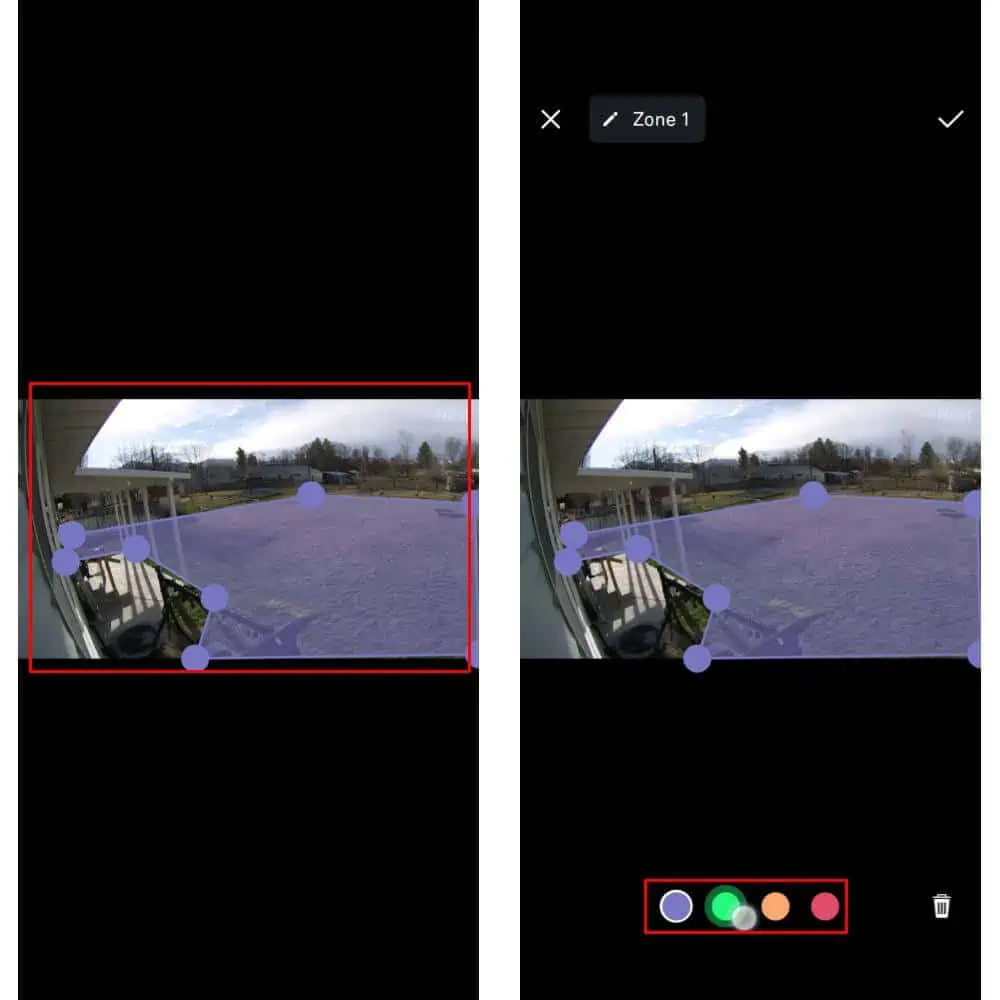
Once the zone is created, a tap on the screen re-reveals the UI for other adjustments. Select a color using the bottom bar UI, as shown in the following image.
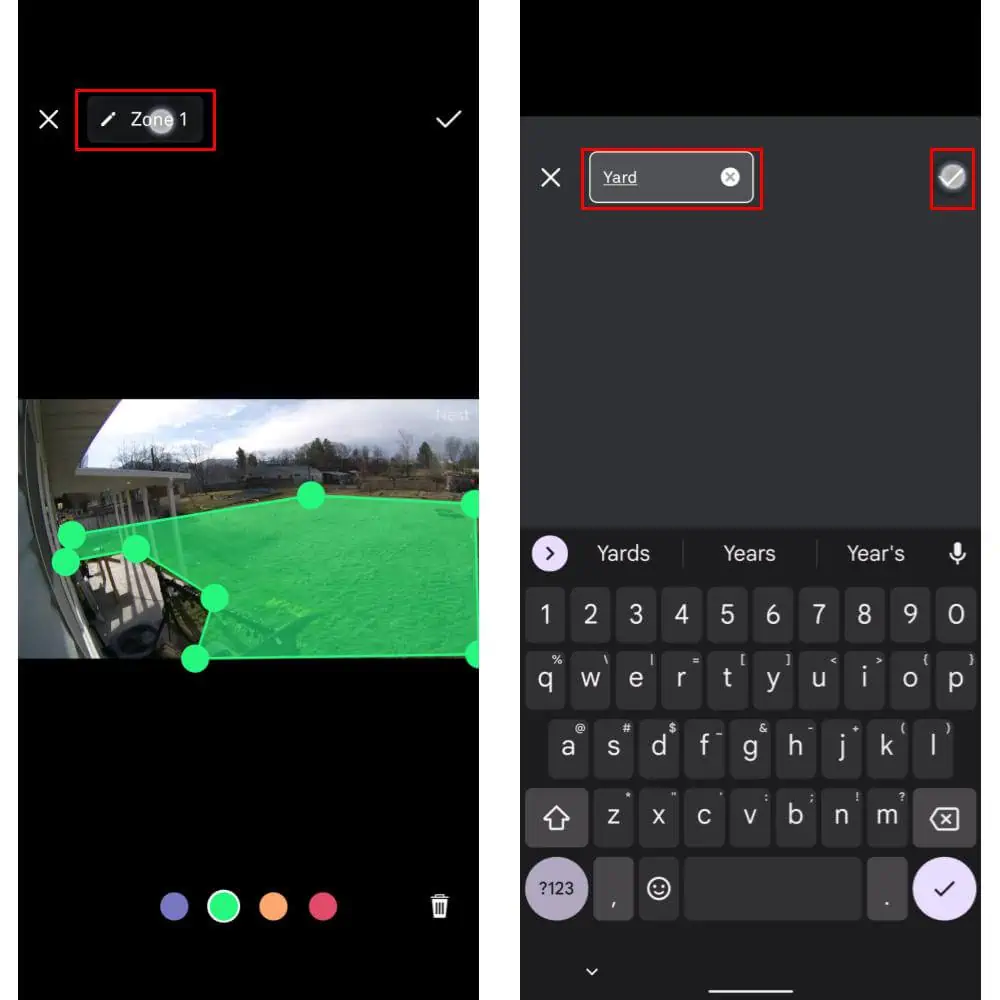
Now, select the box UI at the top left-hand side of the display. That contains a pencil icon and default zone name. Type in a new name for the zone. We’ve chosen “Yard” since that best represents the zone in question. Then select the checkmark to confirm your change.
Your zone will now be shown among any others you’ve created on the “Activity Zones” page. You can change what is being monitored by selecting the “Notification Settings” link located at the bottom of the Activity Zones page. Then select the zone you’d like to adjust monitoring for.
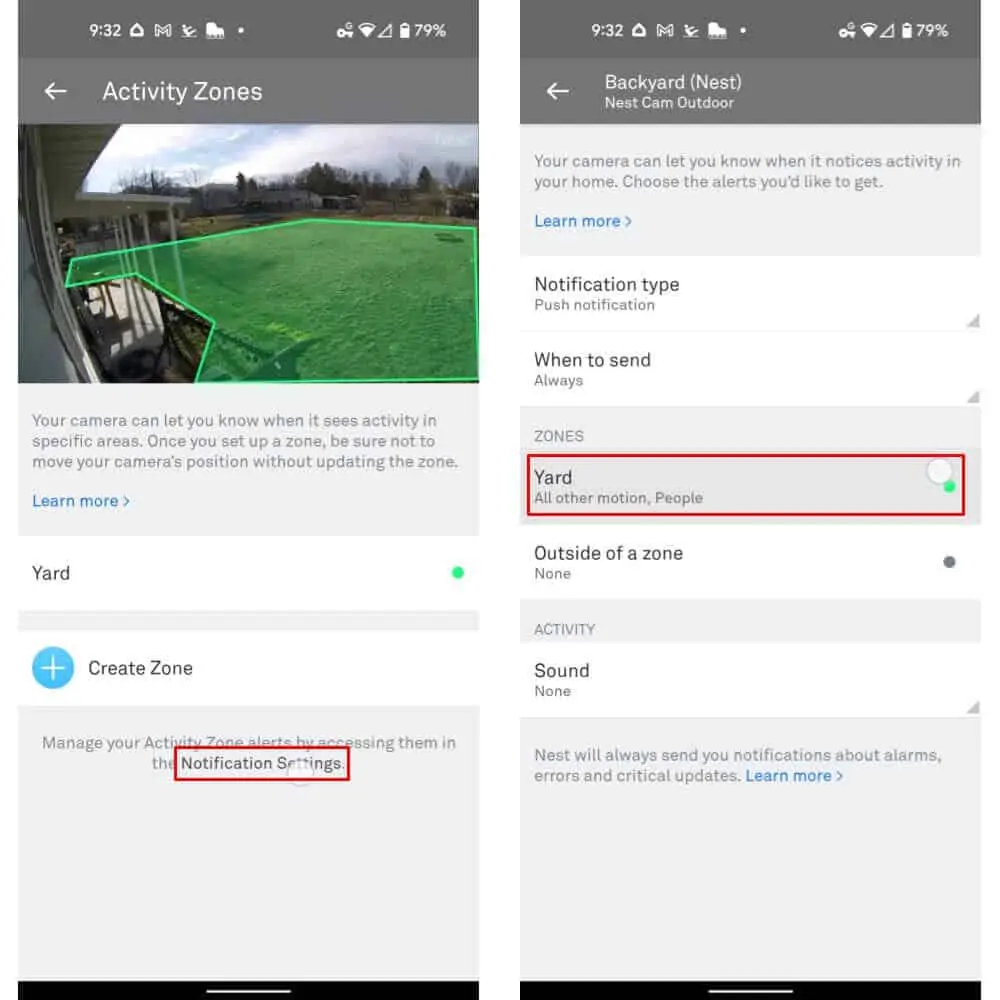
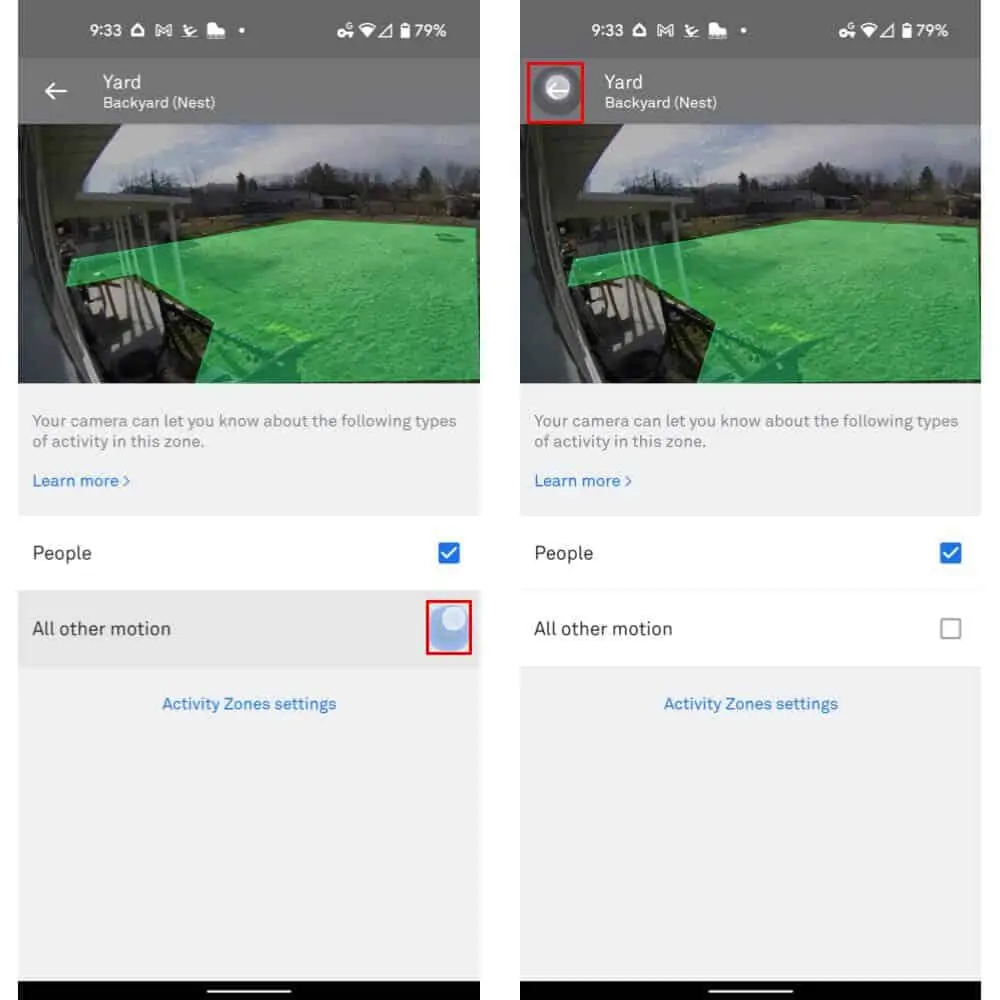
On the following page, you’ll be presented with options. As shown below, those were “People” and “All other motion” for our devices. We de-selected “All other motion” since we weren’t as concerned with animals or other motions in that our “Yard” zone. Choose the options you’d like to use and then select the “Back” arrow. That’s located at the top left-hand side of the page.
You’ll have a similar range of options for the area outside the zone as well. Those can be found by selecting the “Outside of a zone” option on the camera’s notifications page. That’s the page that loads up after the above step. Once finished, tap the back arrow at the top left-hand side of the UI. Nest will automatically save changes you’ve made to activity zones for your cameras.