18-55mm lenses: how to shoot stunning portraits using just your standard lens
You don't need to use a fast prime lens to capture great portrait photography

You don't need to use a fast prime lens to capture great portrait photography. In this tutorial we'll show you how to take amazing people pictures using simple 18-55mm lenses and a reflector.

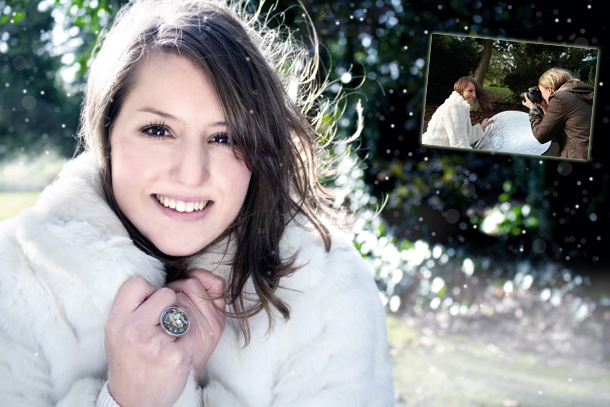
In addition to our 18-55mm lens, we're using a reflector to bounce light into the shadows of our model's face. We dressed our model in winter clothing and accessories to suit the seasonal theme - bright hats and gloves, and fur hoods or coats all work well.
The 'classic' focal length for portraits is usually said to be around 85mm, so you'll want to zoom your 18-55mm lens to its longest focal length of 55mm, or close to it (55mm multiplied by the 1.6x crop factor gives you an effective focal length of 88mm).
However at this focal length you won't be able to use your lens's maximum aperture of f/3.5 - you'll be at f/5.6 or close to it - so you'll need to up your ISO to give you a fast-enough shutter speed to shoot handheld.
Narrow apertures also capture more depth of field, so you'll need to put plenty of space between your subject and their backdrop to ensure that you can blur the background effectively.
At the editing stage we'll show you how to cool your image's colours to enhance the wintry feel, and even add some fake snow!
SEE MORE: 10 portrait photography mistakes every photographer makes (and how to fix them)
Get daily insight, inspiration and deals in your inbox
Sign up for breaking news, reviews, opinion, top tech deals, and more.
How to shoot portraits with 18-55mm lenses

01 Setting up
For our shoot we headed to the local park so that we'd have a backdrop that was colourful without being obtrusive, and which would look attractive when thrown out of focus. We sat our model on a bench, with her back to the sun so it created a backlight around the edges of her hair - there was also a bit of wind that helped create movement in the hair.

02 Camera settings
Set your camera to Aperture Priority (Av) mode. You want to strike a balance between shooting at a focal length that will flatter your subject, which on a crop-factor camera will be around 30mm and above, and using a wide-enough aperture to give you a fast-enough shutter speed for shooting handheld. The best approach is to try different aperture/focal length combinations, and take a good variety of shots.
SEE MORE: What is the best aperture and focal length for portraits?

03 ISO and shutter speed
To shoot handheld you want to make sure your shutter speed is reading above 1/100 sec, and to obtain this speed you may have to increase your ISO - we set ours to ISO800. You might be able to get away with ISO400 if there's enough light - just remember to keep an eye on your shutter speed as you're shooting.
SEE MORE: ISO settings in low light - when and how to increase your camera's sensitivity

04 Focus and light
We composed our shot using the rule of thirds, placing our model on one side of the frame. To help you focus on your subject accurately select the Single point AF setting, and select a focus point that corresponds to the position of your subject in the frame.
SEE MORE: Autofocus point options - what subjects should each be used with
You're now ready to start shooting. You can get your model to hold the reflector, but for the best results you'll need an assistant to hold it, so your model's movements aren't restricted.
Final Tips on Setting Up
The best way to use your reflector
If you have a five-in-one reflector you can opt to use the silver or the gold side. The silver side creates a cooler result, and the gold side creates warmer light, so we'd recommend using the silver side for your winter portrait shoot. You may find it useful to get an assistant to hold the reflector for you, as this will leave your and your model's hands free. When you're using a reflector make sure the light isn't shining directly into your model's eyes, as you don't want them to be squinting.
SEE MORE: When to use a reflector - the effects produced by different coloured surfaces
Choose the right backdrop
The backdrop is an important element of a portrait, and it can make the difference between a good shot and a great one. In our park setting we looked for colours that complemented our model, and which looked attractive when blurred.
SEE MORE: Color Theory - the best color combinations for photography (and how to take it further)
Despite what you'll often hear about not shooting into the sun, it's a rule you can break with portraits, as long as you can get enough light on to your model's face. The sun will backlight your model's hair to create a halo effect, and at wide apertures the bokeh effect will turn highlights into soft, shimmering patches of light.
PAGE 1: How to shoot portraits with 18-55mm lenses
PAGE 2: How to edit your standard lens portrait
READ MORE
10 common portrait photography mistakes (and how to avoid them)
14 portrait photography tips you'll never want to forget
18 of the best-ever posing tips for group photos
Photography lighting: take control of everything from natural light to off-camera flash
Most Popular


